Sunday 25 October 2015

40 Great Nail Art Ideas - Orange Purple Green + Negative Space

This week I got a winning combo. I love negative space manis and the selection of hues was one of my favourites. As I read the prompt for the first time, I started recalling what exact polish I wanted to use for each colour. Orange  would be Revlon's Lady Luck, Purple would be the beautiful Plume and Green Room for er, the green, the last two from Topshop.  I know the orange looks like pink and the purple leans more towards the blue side  but I figure that this is more on the pastel side of the spectrum.


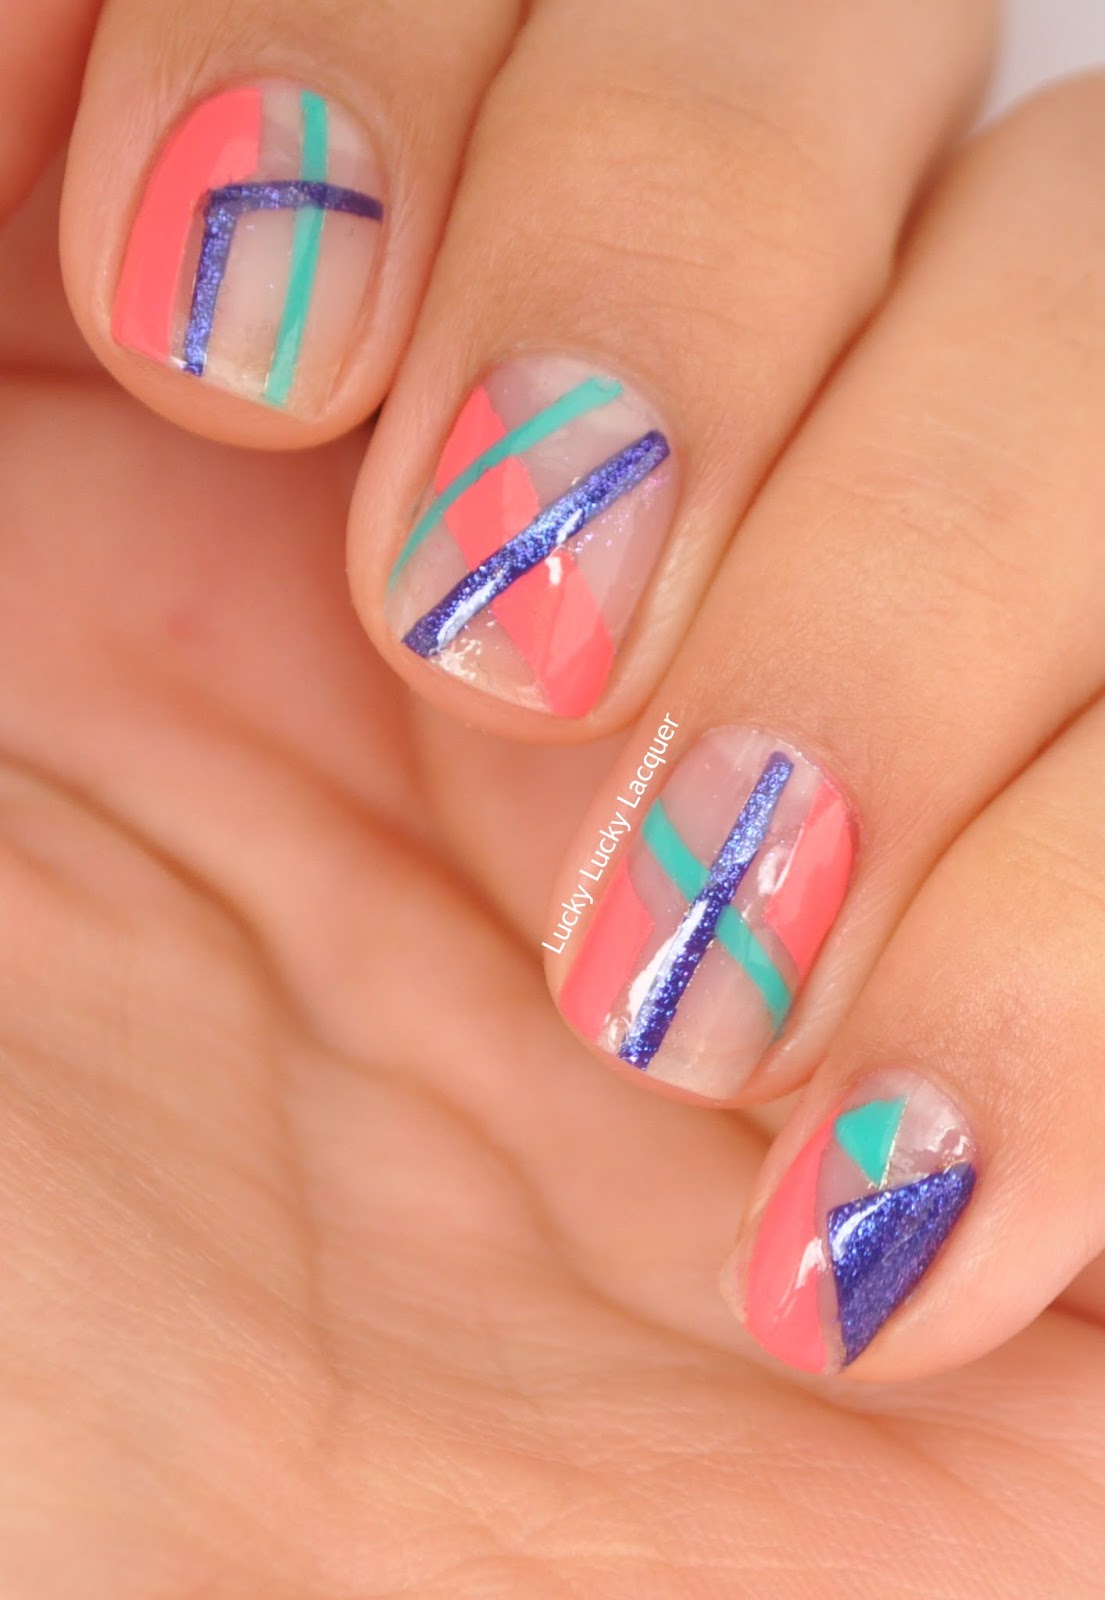
I started with no base. I know, right? What craziness is this, more on that a bit later. With some stripping tape in place, I painted on some shapes and stripes with some Max Factor's Purple Haze to give Plume a base as the latter can be a bit sheer by itself. Then painted on Green Room covering the purple with tape and finally applied Lady Luck using the same technique. Applied HK Girl Top Coat to smooth it all out and seal it in.


I managed to smudge on of the thin purple lines just after topcoating it but with the help of my trustworthy (and very frayed) striper brush I managed to fix it pretty well. It's hardly noticeable now. Can you tell which one it was? Hehe.


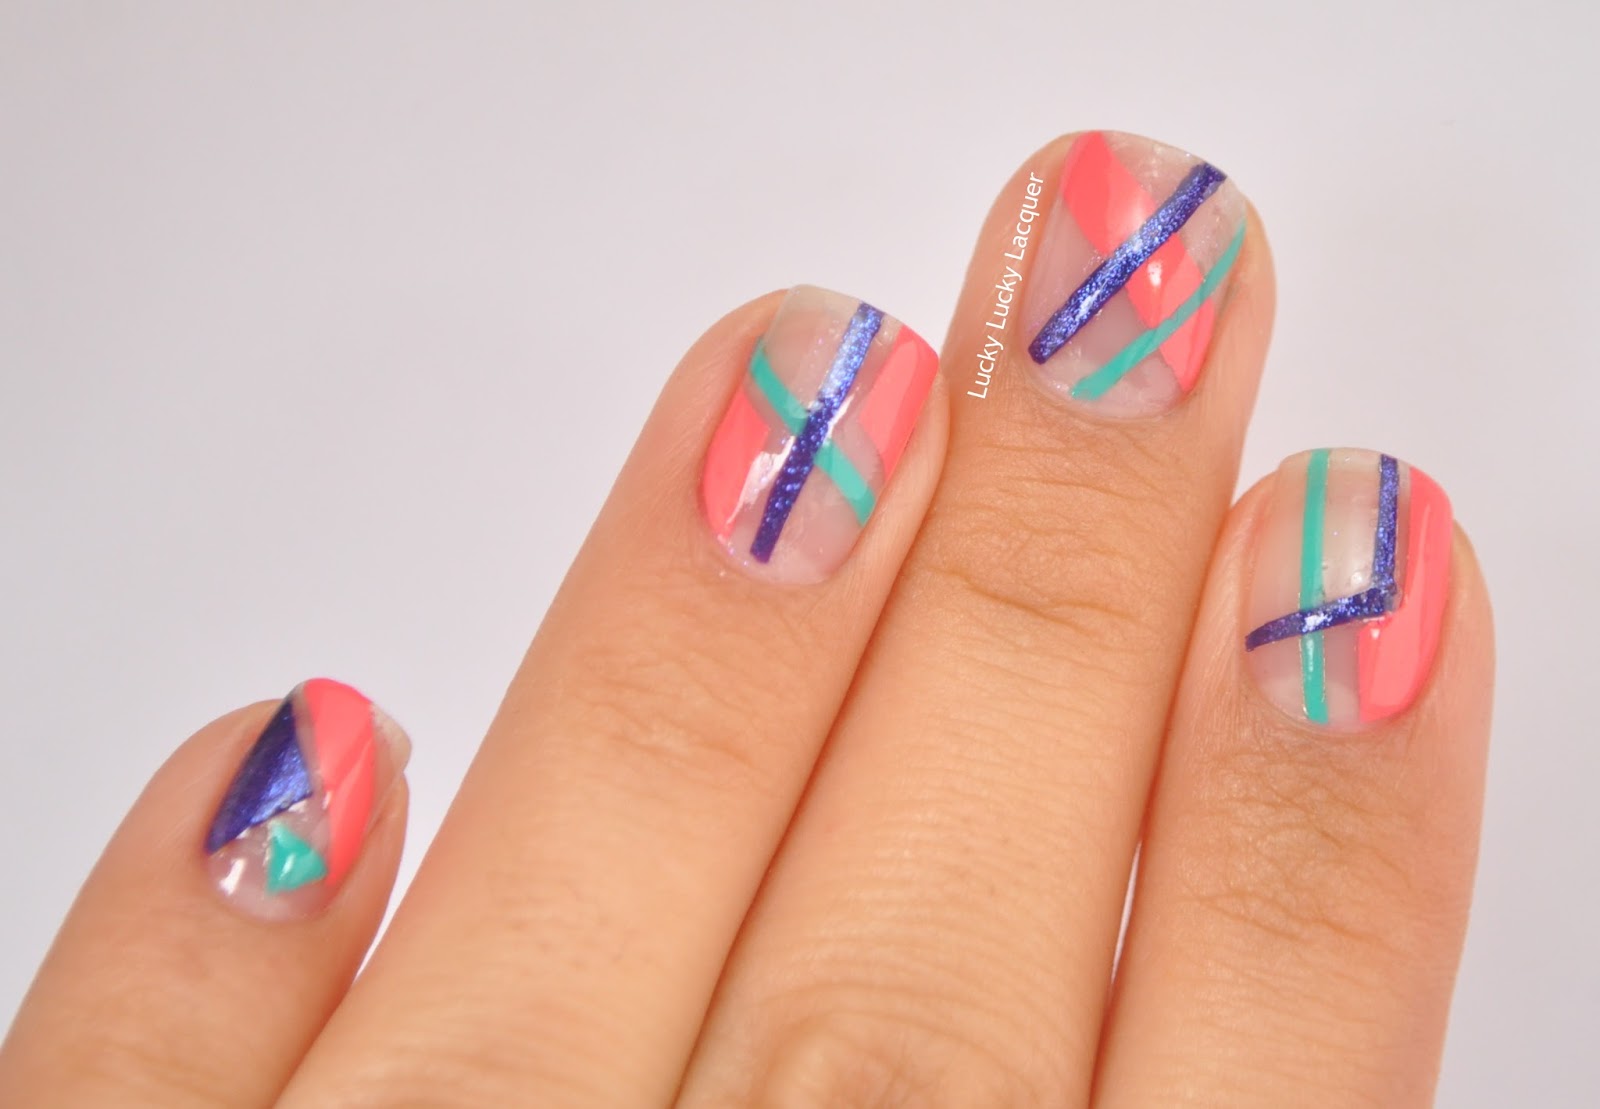
The photos above show my second attempt. My first mani (below) was actually freehanded but it felt too rough to put it up on the blog. I liked the fact that it had more polish and less free space but I figured it would take me forever to clean it up or do it with tape so I just enjoyed it for what it was and reattempted it. And because I was in such a hurry to get the next one done, I forgot to put base on. That's my story.


Till next time, 

Laura


Friday 16 October 2015

40 Great Nail Art Ideas - Geeks

The idea of a geek has a long way from its original meaning and anyone could be called a geek if one's passionate and into a hobby hard enough to know heaps about it. I feel like it's almost cool to have something to be that passionate about and call yourself a food geek, literature geek, gaming geek, etc. I wanted to take it back to the latter sort of geek, which is the meaning of the word I grew up with and really, what better (and easier) way to create it than with one of the original video games, Tetris? I've loved that game for most of my life so it would eventually make it to my nails. Perfect opportunity.


I used two coats of Essence's Wild White Ways as a base and used HK Girl topcoat to stick the different coloured square rhinestones. Used the same topcoat to seal it all in. Simple  and quick as as that. Leaves me with more time for Tetris. :)


I had to plan the shapes out before I stuck them to my finger as I wanted to make sure they look good and they would fit. There has been plenty of times where designs look good in my head but when executed, they turn a little less pleasing to the eye. Who would have known planning ahead would come in handy? And I actually love these nails. They don't look great close up but they are sparkly and colourful. A good combination for the novelty nail. 


Till next time, 

Laura


Friday 9 October 2015

40 Great Nail Art Ideas - Teal

The needle drag technique. When it works, it can look pretty amazing. For me it was a whole new experience, so new I had to look up how to do it properly. I attempted a few times with white bases, coloured bases, a needle, a toothpick. None of it really worked. Then I decided to create the needle drag on a clear base, just in case it turned into a scrape rather than drag, and cheated a little and used a stripping brush to create the dragging effect, needles weren't just doing it for me. So I came up with this.


I started with a Ulta3's Clear as it's a fairly slow drying polish then dropped three dots of L.A. Girl's 3D Effect in Teal Dimension, a beautiful glittery teal, and dragged the stripping brush over every dot to make 'petals'. I had the idea on my head of making flowers and I didn't end up to far from it. To create a better flower shape, I added a little rhinestone to the place where petals met and topcoated the whole lot with HK Girl Fast Drying Top Coat. Not happy leaving it at that, I added three gold beads to balance the symmetry on the finger. I didn't topcoat those and I probably should have, considering I lost a bead while photographing these nails. 


I'm a bit bummed about the photos. Since I have moved and my old photo set up (i.e. my parents' backyard) is no longer readily accessible, I have to find a new place and lighting to make nails look good. The colour temperature and background in my bathroom turned out awesome but there is not enough lighting and my lamp casts funny shadows behind my hands, as you guys can see. I might have to go out to the street to make sure I get good photos . Who cares if I look like a random taking photos of my hands when everyone can see. Haha!


Till next time, 

Laura

Saturday 3 October 2015

40 Great Nail Art Ideas - Hobbies

So I'm back on the blog and really what better way to come back that with the 40 Great Nail Art Ideas challenge. I may have lost some of my blogging mojo but I know I can get it back and will produce some better stuff as we go along.

This week's theme was hobbies. When it comes to hobbies, I have a lot. I would say I have a lot of interest in the things has to offer rather than having a impatient mind. I started with the idea of volleyball, cos it's what I do most days even I can be rather bad, but the colours weren't right, I smudged the mani, the colours I wanted to use weren't opaque enough. Then, I thought of astronomy. It's not something I do very often but I have been interested in sky gazing for at least 10 years so I figured it'd be good to do since I've never successfully done any galaxy nails. I tried again. I wouldn't say entirely successful in my attempt but I tried. 


I created a marble base with OPI's Sheer Tints I Can Teal You Like Me and Don't Violet Me Down, then applied a coat of flakies from Sephora called Snowflakes and sponged on some Space Queen by Essence to create some sort of galaxy effect. I then did another marble with the tints to create opacity and seal in the glitter. I then tried to create some constellations with a brush and some unnamed white polish but that's when it all went down. :( I topcoated it all with HK Girl Fast Drying Top Coat.


It's super sparkly IRL but I just couldn't capture with the camera. Hmm... Have to get back to practising all this skills I once had. Hehe.


Until next time, 

Laura


Tuesday 29 April 2014

The Neverending Pile Challenge: Most Expensive

I like to think I am quite thrifty when it comes nail polish buying but every so often I feel like splurging if there is something amazing that I can't get any dupes for cheaper. When I started blogging, I'd see swatches of holographic polishes and I'd just look at the my screen trying to keep my mouth closed. Unfortunately, I couldn't find any holos at the local Target so I had to go hunting for the only brand I knew had good holos and I knew where to get from. Yes, it took a plane, bus and tram round trip to get the $19.95 Layla Hologram Effect polish (I had other plans for this trip but I was utterly excited to go shopping for polish). Yes, I was unaware if the price when I gave it to the checkout lady and didn't want to seem like a cheapskate and put it back on the shelf before walking out. As awkward as that experience was for me, today I can be glad that Coral Glam is part of my stash. 


This wasn't an untried as such. I had put it on on a couple of fingers  before to marvel at the beauty of the holo but had never worn it as a full mani. And man! I forgot how pretty this was. It's subtle enough on the shade but once it comes out to the sun that flame is strong. 


By the way, I used a base coat for this ad three coats of  Coral Glam to reach opacity and cover up all the drag marks that I manage to get during application.


I'm not good at leaving nail polish alone so I added my first ever DIY nail decal with a three of unused polishes. I used Konad Special Nail Polish in Black for the outline and coloured in the flower from MoYou's Suki 04 plate with Revlon Parfumerie's African Tea Rose, Sunlit Grass and Apricot Nectar. I thought the green polish was an unused polished but turned out I had used Essence's The Green & the Grunge before. Once I applied and cleaned up around the decal, I topped the whole mani with one coat of HK Girl Top Coat.


I know the decal isn't the best but I'm happy with the way this turned out. And you know, one can always look at the holo instead of the decal. :)


I really like this polish and I am glad it has come out of the untried  stash considering all the effort that was required to get this little bottle.

Till next time, 

Laura


LinkWithin

Related Posts Plugin for WordPress, Blogger...